The Best Headlight Restoration Kits
Cloudy headlights sneak up on you. One night you're driving a back road and realize the pool of light in front of the car has shrunk to a smudge. That's not your eyes getting older. It's the factory coating on your polycarbonate lenses breaking down under years of sun, and it can cut your forward light output dramatically. A restoration kit sands off the oxidized layer, polishes what's underneath, and seals it back up. On most cars it's an afternoon of work with a rag and a drill.
But every kit here is treating a symptom, not curing the disease. Once the factory UV layer is gone, you're relying on whatever sealant came in the box, and none of them last forever. Owners report a return of haze anywhere from several months to a couple of years out, depending on climate and where the car sleeps. Kits also can't touch damage that isn't on the surface. If moisture has fogged the inside of the housing or the lens is cracked, no amount of sanding fixes that.
The other thing nobody tells you: results depend more on your patience than on the brand. Rushing the sanding stages or skipping the sealant is how people end up disappointed. We think that the 3M Headlight Lens Restoration System is the best headlight restoration kit for most people, and that the SYLVANIA Headlight Restoration Kit is the one to buy if you don't own a drill or you're doing this for the first time.
Everything we recommend

The most thorough sanding progression, if you own a drill
No drill needed, and the sealant step is hard to mess up

A ceramic sealant and a two-step process, for a price

Drill attachments and a sealant wipe for less outlay
At a glance
| Product | Tool Required | Coating Type | Price | |
|---|---|---|---|---|
| 3M Headlight Lens Restoration SystemTop pick | Drill-Activated | — | $19.99 |
| Meguiar's Heavy Duty Headlight KitUpgrade pick | — | — | $37.99 |
| SYLVANIA Headlight Restoration Kit - Long-Lasting HeadlightAlso great | No Tools Required | UV Block Clear Coat | $18.98On sale |
| Rain-X 610153 Headlight Restoration Kit - CarBudget pick | Drill Attachments | Protective Sealant | $18.67On sale |
 | Turtle Wax T-240KT Headlight Lens Restorer KitAlso consider | — | — | $20.80 |
How we picked
Oxidation severity range. We compared what each kit's abrasives are rated to remove, from surface haze to deep brown staining. Kits that only polish were held to a lower bar than those with a real grit progression.
UV sealant quality. We looked for a clearly separate sealant step rather than a polish with UV inhibitors mixed in. Owner reports of how long clarity held up mattered more than the number printed on the box.
Drill or no drill. We checked whether each kit actually works by hand or just claims to. Kits that need a drill were judged on whether they say so plainly and include the backing plate.
What's in the box. We read spec sheets and listing contents to see whether a kit covers two lenses with room for a second pass, and whether basics like tape are missing.
Owner failure patterns. We read through owner feedback for repeat complaints — sticky coatings, compound spatter, lenses that never fully cleared — and weighted those over one-off gripes.
Top pick
The most thorough sanding progression, if you own a drill
3M Headlight Lens Restoration System
3M's kit runs your drill through three sanding stages and a rubbing compound, which is why it handles yellowing that lighter kits just smear around. You'll need a drill and a roll of painter's tape, neither of which comes in the box.
$19.99fromAmazonThe multi-stage sanding is the whole point. You start with 500-grit gold discs, move to 800-grit white finishing discs, then a Trizact refining disc, then rubbing compound. Each stage erases the scratches the last one left. Cheaper kits jump from coarse paper straight to polish, and you can see it in the finish — a faint haze that never quite clears. Owners who follow the sequence describe lenses that look genuinely new.
A drill does the work so your arms don't have to. The kit includes a 3.25-inch pad holder that chucks into any variable-speed drill. Constant rotation gives you even abrasion across the whole lens, which matters most on the big wraparound headlights common on SUVs and trucks. Hand-sanding the same area takes far longer and tends to leave the edges under-worked. Several owners specifically call the drill non-negotiable.
It's the kit most people already trust, and the feedback backs that up. This is far and away the most-reviewed kit in the group, and the sentiment skews strongly positive. Owners restoring ten- and fifteen-year-old lenses report dramatic improvement, including on lenses pitted by road debris rather than just sun-faded. That volume of consistent feedback is worth something. It means the process is reproducible by people who aren't detailers.
It works on scratches and pitting, not just yellowing. The coarse stage removes enough material to level out small rock chips and swirl marks that polish-only kits leave behind. If your lenses have been sandblasted by highway driving, this is the kit with enough cut to do something about it. Owners with scratch-and-pit damage rather than pure oxidation report good results, which is not true of every kit here.
Flaws but not dealbreakers
There's no drill and no tape in the box. You need to supply both, and you need more tape than you think — two overlapping layers around each lens, extended a couple of inches onto the bumper if you're cutting aggressively. Abrasive discs will chew through clear coat in seconds, and that repair costs far more than the kit. Buy an extra roll before you start.
It has limits on severe, baked-in oxidation. Owners with deeply browned lenses on older cars report partial improvement rather than a full reset — some color lifts, but the lens doesn't go clear. If your lenses have gone amber all the way through rather than just cloudy on top, temper your expectations or plan on multiple passes.
Longevity depends on what you're restoring. Owners note that results hold up better on original factory lenses than on cheap aftermarket replacements, which tend to yellow again quickly no matter how well you prep them. Climate matters too. A car parked outside in Phoenix will haze faster than one in a garage in Seattle.
Also greatOn sale
No drill needed, and the sealant step is hard to mess up
SYLVANIA Headlight Restoration Kit - Long-Lasting Headlight
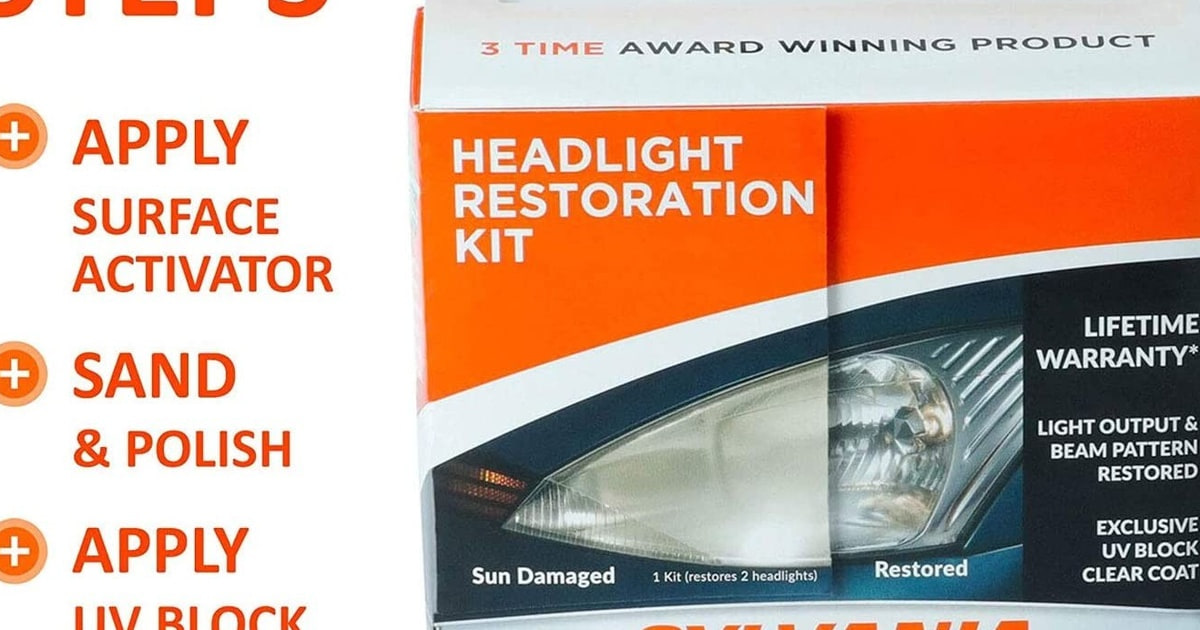
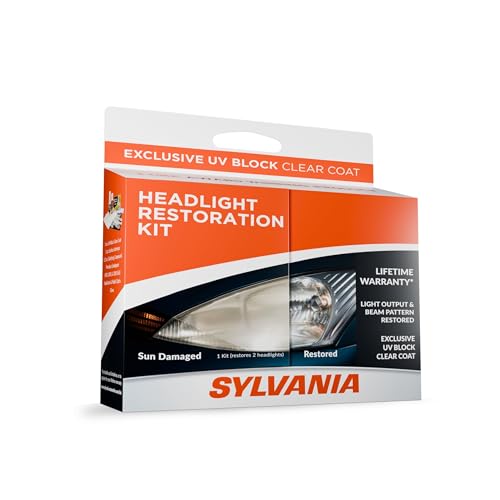
Sylvania's kit walks you through surface activator, sandpaper, clarifying compound and a UV clear coat entirely by hand. It's the one to buy if you've never done this before, or if the only drill in your house belongs to a neighbor.
$18.98fromAmazonList priceEverything you need is in the box, and no tools are required. Surface activator, premium sandpaper, clarifying compound, UV block clear coat and applicators. The steps are labeled and sequenced, which sounds trivial until you realize the most common way people ruin a restoration is skipping the sealant. Owners consistently describe the instructions as clear and thorough, and first-timers report results they didn't expect from a kit this simple.
The UV clear coat is the part that earns the pick. Restoration without a real sealant is a waste of an afternoon — bare polycarbonate starts re-hazing almost immediately. Sylvania includes a dedicated UV block coat as a distinct final step rather than folding weak inhibitors into a polish. Owner feedback on how long results hold up is among the strongest in this group.
It's the highest-rated kit here by owner sentiment. Reviews skew heavily positive, including from people who openly admit they usually botch car projects. That's the signal you want in a beginner product. Owners restoring badly clouded lenses report the lens looking like new afterward, and several went in skeptical and came out surprised.
Hand application is genuinely workable, not just technically possible. Some drill-oriented kits claim hand use and then leave you scrubbing for an hour with mediocre coverage. The applicator pads here generate enough friction to do real work. Expect to spend real time on it — a couple of owners took several hours across multiple lenses — but the effort translates into results.
Flaws but not dealbreakers
It doesn't cut deep enough for severe damage. The abrasive is gentler than 3M's disc progression. On lenses with deep yellowing, brown staining or pitting, you'll get improvement but not a reset. Match this kit to haze and moderate yellowing, and step up to a drill kit for anything worse.
It's slow, and complicated lens shapes make it slower. Owners working on vehicles with contoured or multi-piece lamp assemblies report the shapes being a pain to work by hand. Budget more time than the box implies, especially if you're doing both sides.
The kit covers two lenses and not much more. There's no spare material if you need a second pass on a stubborn lens. Plan your session so you don't run out halfway through the driver's side.
Upgrade pick
A ceramic sealant and a two-step process, for a price
Meguiar's Heavy Duty Headlight Kit
Meguiar's pairs a drill-driven cleaning solution with a ceramic UV shield rated for 18-plus months. It's the shortest process here — clean, then wipe on the coating — but the small owner base reports mixed results with the coating itself.
$37.99fromAmazonTwo steps is genuinely fewer things to get wrong. You attach the oxidation removal pads to the included 3-inch backing plate, run the cleaning solution with your drill, then hand-apply the ceramic shield with a towelette. No grit progression to track, no order to memorize. Owners who took their time and repeated the cleaning stage as needed report lenses on decade-old cars coming back clear.
The ceramic shield is the most ambitious sealant in this lineup. Meguiar's rates it at 18-plus months of protection, and it's formulated as a dedicated coating step rather than a protect-and-polish hybrid. Since sealant quality is what determines whether you're doing this again next spring, that's the right thing to spend money on.
Repeat passes are built into the plan. Owners with heavily oxidized lamps describe running the abrasive stage three times before moving on, and the kit had enough material left over to do a second vehicle's worth of lenses. If you're working through a badly weathered car, that headroom matters more than a fast single pass.
Meguiar's chemistry has a long track record. This is a detailing company, and the cleaning solution and coating are formulated for polycarbonate rather than borrowed from a general plastic polish. Owners who already use the brand's other products cite that as the reason they trusted this kit on lenses they were nervous about.
Flaws but not dealbreakers
The coating is where the complaints cluster. Multiple owners report the ceramic shield staying tacky longer than the instructions suggest, leaving a sticky feel on the lens. Worse, the supplied towelettes can shed fibers onto the wet coating. Work in the shade, go thin, and have a clean microfiber ready.
It's the priciest kit here and the box oversells what's inside. Several owners open a large carton to find modest bottles and a couple of pads, and say so bluntly. The contents do the job, but the packaging sets up a letdown.
The owner base is small and the sentiment is split. Far fewer people have reviewed this than the 3M or Sylvania kits, and the negative reviews are a meaningful slice rather than noise. That's a thinner safety net than we'd like on the most expensive option, which is why it's the upgrade rather than the top pick.
Budget pickOn sale
Drill attachments and a sealant wipe for less outlay
Rain-X 610153 Headlight Restoration Kit - Car
Rain-X bundles sanding and polishing discs that chuck straight into a drill, plus a sealant wipe, at the lowest cost here. It handles haze and moderate yellowing well, as long as you don't skip steps and you mask the car properly.
$18.67fromAmazonList priceYou get drill attachments at a budget price, which is unusual. Most inexpensive kits hand you a sponge. Rain-X mounts the sandpaper on drill discs, so you get the even, fatigue-free abrasion that normally costs more. Owners specifically thank the kit for sparing their shoulders. If you already own a cordless drill, this is a lot of capability for a small outlay.
The results on ordinary cloudiness are genuinely good. Owners with lenses they'd written off as hopeless report clear results after following the process. One owner finished a single headlight in about twenty minutes; another took over an hour on a bad one. Either way, the improvement in night visibility is the thing you actually feel.
The sealant wipe is simple and hard to skip. It's a single included wipe applied at the end, and Rain-X built its name on UV-blocking coatings. The application is straightforward enough that first-timers don't get lost, which matters because skipping this step is what turns a good restoration into a three-week one.
It's the easiest kit to justify for a car you're about to sell. If you want clearer lenses before a trade-in or a long road trip and you don't care about a multi-year finish, this does the visible work for the least money and time.
Flaws but not dealbreakers
Masking is not optional with this one. Owners warn that drill-spun compound sprays everywhere and doesn't wipe off easily, leaving speckles on dark paint. Tape generously, cover the surrounding bodywork, and consider a drop cloth over the bumper.
The sealant doesn't last as long as the better kits. Expect to redo the coating sooner than with the 3M or Sylvania systems, especially if the car lives outdoors in strong sun. Reapplying just the sealant is quicker than a full restoration, but it's another item on the calendar.
Skipping a step shows immediately. One owner who cut a stage on one lens ended up with a blurred finish on that side. The process is short but unforgiving. Sand wet, go slow, and don't let the coating dry out mid-application.
Who this is for
Buy a kit if your lenses look cloudy, yellow or hazy on the outside and the dimming has been gradual. That's surface oxidation, and it's exactly what these products address. You'll get the most out of one if you can work in the shade for an hour, you're willing to tape off the surrounding paint, and you accept that this is maintenance you'll repeat every year or two rather than a permanent fix.
Skip the kit if the fog is on the inside of the housing, if there's water pooling in the lamp, or if the lens is cracked or impact-damaged. No amount of sanding reaches those problems, and replacement is the only real answer. This guide covers consumer DIY restoration kits for modern polycarbonate lenses. It doesn't cover professional detailing services, replacement lens assemblies, standalone polishes, or anything meant for glass headlamps on older vehicles.
How we picked
We weighed five things. Oxidation severity: we matched each kit's abrasive system against the damage it credibly handles, from light haze to deep amber staining, since an underpowered kit on a badly weathered lens is wasted effort. UV sealant: we favored kits with a distinct, clearly labeled sealant step, because bare polycarbonate re-hazes within weeks without one. Tool requirements: we checked whether hand application is genuinely viable or just technically possible, and whether drill kits include the backing plate you need. Kit completeness: we read listing contents for spray lubricants, adequate pad counts and enough material to finish both lenses, and we flagged the kits that leave out masking tape. Owner failure patterns: we looked for complaints that repeat across many buyers — sticky coatings, compound spatter, incomplete clearing on severe oxidation — and treated those as real limits rather than user error.
Other headlight restoration kits worth considering
If you want a multi-step process without the drill-kit outlay: The Turtle Wax T-240KT Headlight Lens Restorer Kit ($20.80) — Turtle Wax's T-240KT is the value option in this group, built around a multi-stage sanding sequence, a polishing compound and a sealant coat. The step count is its main advantage over one-shot budget kits — working through progressively finer abrasives leaves fewer micro-scratches in the finish, which is what makes a restored lens look clear rather than merely lighter. It works with or without a drill, so it's flexible about your garage. The catch is that it has almost no owner feedback to lean on, so you're going more on process design than on a track record. And like the other hand-friendly kits, it runs out of cut on lenses that have gone deeply brown.
The competition
This lineup is what our research surfaced among widely available consumer restoration kits, not a survey of everything sold. Every product we looked at earned a spot as a pick or an also-consider, which is unusual but reflects a category where the differences are mostly about how much damage you're fighting and whether you own a drill. There's no bad option here — just wrong matches between kit and lens.
Installation notes
Tape first, always. Run two overlapping layers of painter's tape around every lens and extend it two or three inches onto the bumper if you're using coarse abrasives, because a sanding disc will cut through clear coat faster than you can react. Work in a garage or shade. Direct sun and hot panels make sealants flash off before you've spread them evenly, and that's how you get streaks. Keep the lens wet during sanding to control heat and prevent micro-hazing. Go slow on the first pass and check your progress often. When you get to the coating, apply it thin and don't chase it once it starts to set. Then plan to reapply just the sealant every year or so, which takes minutes and saves you from redoing the whole job.
Questions we get
Do headlight restoration kits actually work?
Yes, on surface oxidation. Sanding away the degraded outer layer of the polycarbonate and sealing what's underneath genuinely restores most of the lost clarity, and owners across every kit here report obvious improvement in night visibility. The results are less dramatic on lenses that have gone deep amber all the way through. The step that decides whether it holds is the UV sealant — skip it and you're back to haze within weeks.
How long do the results last?
Anywhere from several months to a couple of years, depending on the sealant and your climate. Kits with a dedicated UV coating hold up considerably better than ones relying on a polish with trace inhibitors. A car parked outdoors in Arizona, Florida or coastal California will re-oxidize faster than one that lives in a garage. You can stretch results a long way by reapplying just the sealant annually without repeating the sanding.
Which kit is best for severely yellowed headlights?
The 3M system, because its four-stage abrasive progression removes the most material. Meguiar's is the other reasonable choice if you're willing to repeat the cleaning stage several times, which owners with heavily oxidized lamps say is necessary. Both want a variable-speed drill. Be realistic though: lenses that have browned all the way through may improve without ever going fully clear.
Can I restore headlights without a drill?
Yes. The Sylvania kit is designed for hand application and includes everything you need. Turtle Wax works either way. Expect to put in more time and more elbow grease, and expect slightly less even coverage on large or oddly shaped lenses. For haze and moderate yellowing — which describes most cars on the road — hand application gets you most of the way there.
Is restoration worth it, or should I replace the lenses?
Restore first in almost every case. A kit costs a small fraction of a replacement lens assembly and takes an afternoon. The exception is damage a kit can't reach: fog on the inside of the housing from a bad seal, structural cracks, or impact damage. In those cases sanding the outside accomplishes nothing and replacement is the only fix.
Why do headlights turn yellow in the first place?
Modern headlight lenses are polycarbonate plastic, not glass. Polycarbonate is tough and light but degrades under ultraviolet light, and the factory-applied protective coating breaks down first. Once that coating fails, sunlight attacks the plastic directly and it yellows and clouds. Engine bay heat, road salt and grit from highway driving all speed the process up.
Why you should trust us
For this guide:
- We compared the listed contents, abrasive stages and sealant claims for every kit in this lineup against the manufacturers' own specifications.
- We read through owner feedback for each product, looking for failure modes that repeat across many buyers rather than isolated complaints.
- We cross-checked those themes against the original guide's research notes and published coverage of headlight restoration to see which limitations show up consistently.
- We read owner reviews on every listing, weighted toward the critical ones, because that is where the recurring failures show up.
- We have a systematic way of automatically fetching the latest prices, so the numbers on this page stay current.
- This is a research-focused guide, so the team may not own every product listed — though we often do own the top winners, which gives us extra context for the recommendations.
- We don't accept free products, and the retailer commission never changes which product we recommend.
Sources
Best Headlight Restoration Kits, Popular Mechanics
Best Headlight Restoration Kits Tested, Car and Driver
Headlight Restoration Kits Review, AutoWeek
Best Headlight Restoration Kits, Forbes Wheels
Headlight Restoration: Does It Work?, Consumer Reports
Headlight Oxidation and UV Degradation Study, AAA Automotive Research
Best Headlight Restoration Kits, This Old House Reviews
Headlight Restoration Products Tested, The Drive
Amazon product listings and owner reviews for all 5 products
Manufacturer specification pages for each product
Some passages in this guide may be paraphrased with AI help. Prices are refreshed automatically.
More like this.
Continue exploring electronics reviews and recommendations.

The Best LED Headlight Bulbs
Factory halogen bulbs go dim so gradually that you stop noticing. Then one night you're on an unlit two-lane road, and a deer steps out at the edge of…

The Best Car Paint Protection Film Kits
Paint damage on a car almost never arrives all at once. It shows up as a rash of tiny chips on the leading edge of the hood, a scuff where your kid swings…

The Best Electric Bike Conversion Kits
Most bikes sitting in American garages are perfectly good bikes. They just don't get ridden, because the hill between you and the office feels steeper on…

The Best Wireless Backup Camera Kits
Backing up is where most parking-lot damage happens, and mirrors alone won't show you the toddler's scooter lying behind your bumper. A wireless backup…

The Best Car Emergency Kits
A car emergency kit is the thing you ignore for years and then need at 11 p.m. on a shoulder with your hazards blinking. The jobs are boring and…

The Best Car Detailing Kits
A good detailing kit changes how your car looks from ten feet away. Road film, brake dust and water spots build up in layers, and a quick run through an…